

White-labeling offerings
Yuzu offers full white-labeling for the Plan Designer. This includes white-labeled:
Portals
ID Cards
Communications
EOB / EOPs
Reports
Digital Forms
Demo environment
Step 1: Add branding information
From the portal go to the far left side bar > ‘Settings’ > ‘Designer.’ You can only access the ‘Designer’ tab if you have been marked as a Plan Designer in our system - please ask your Yuzu contact in Slack if you cannot see the Designer tab!
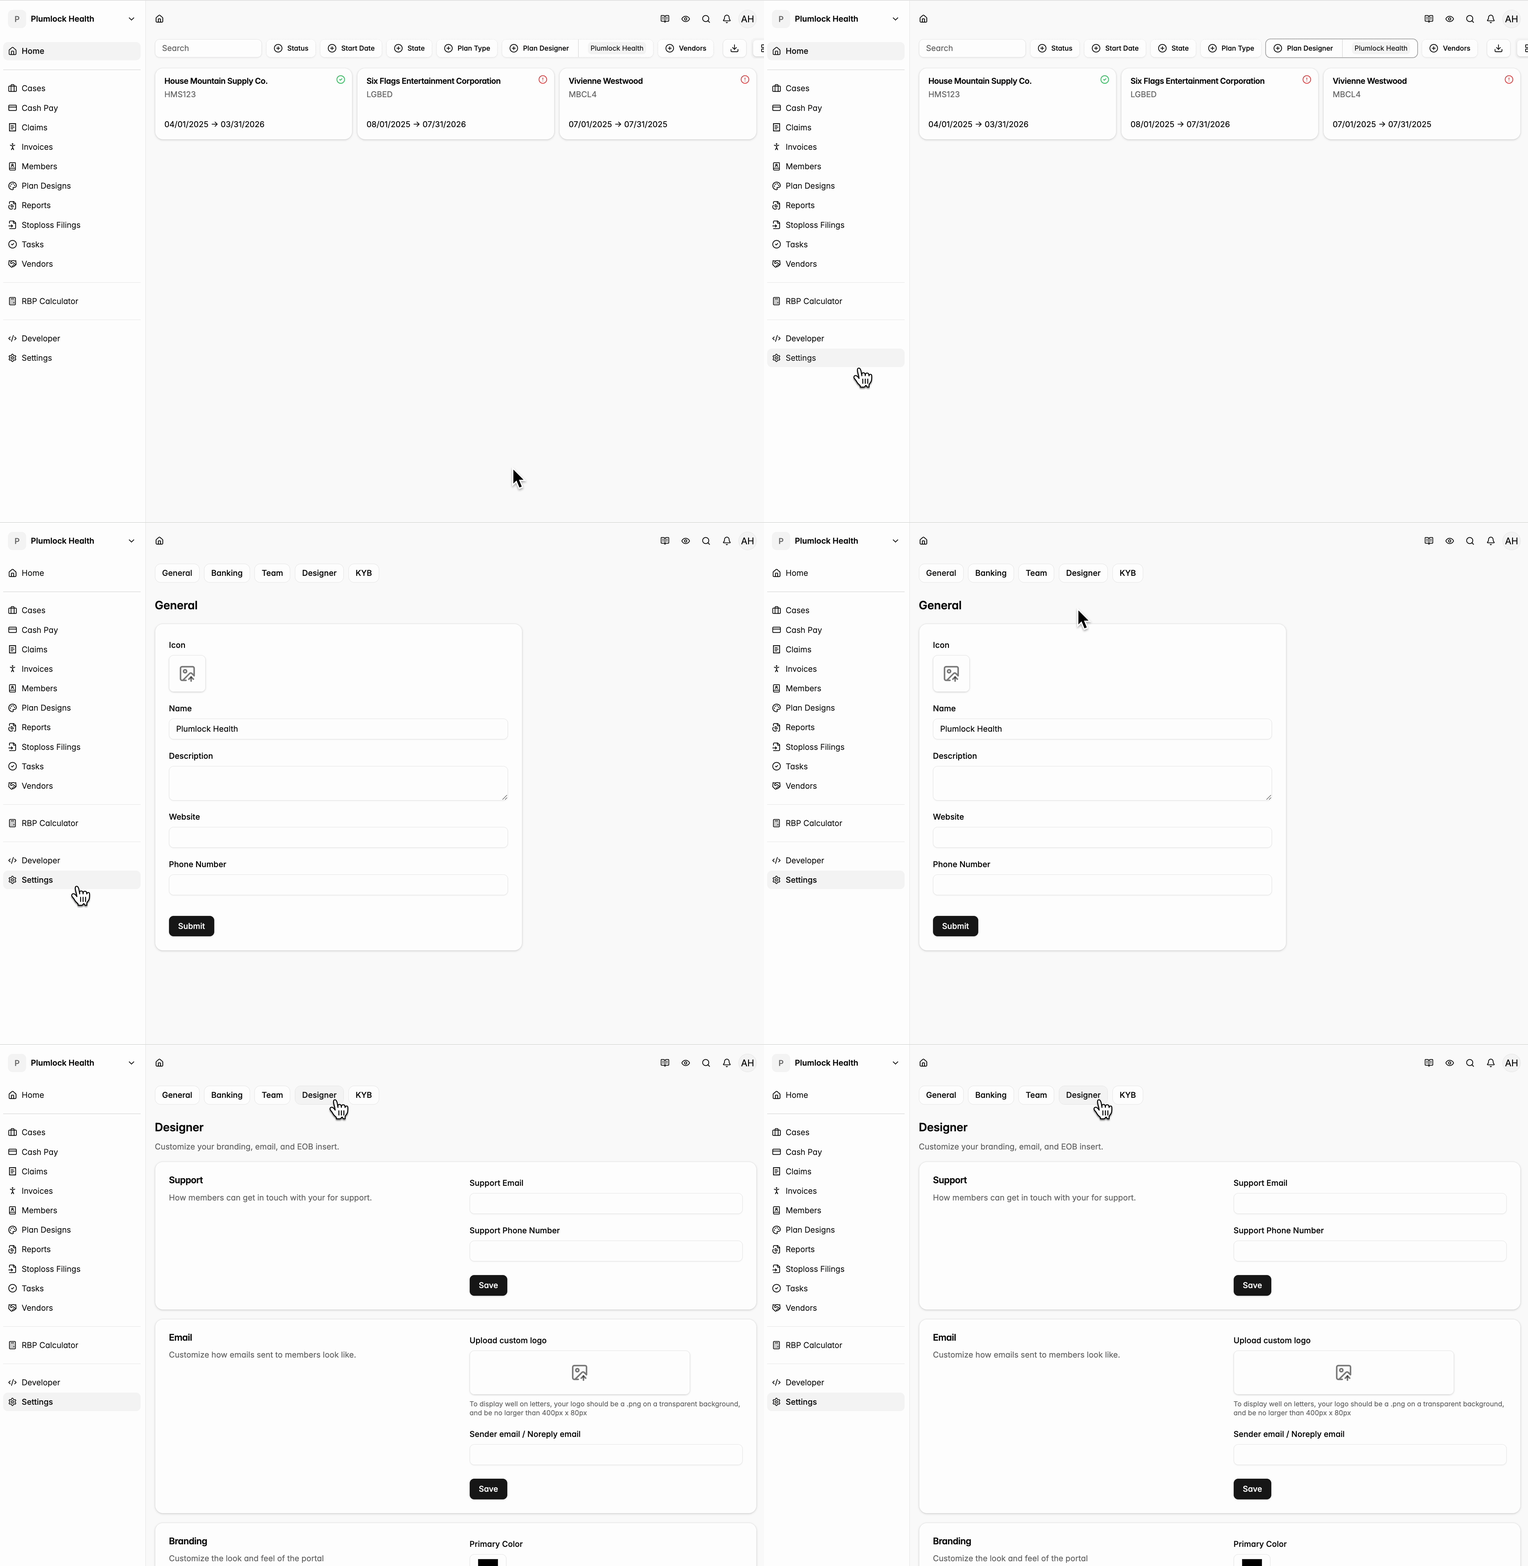
Support
Support Email and Support Number
Included as contact information for members on EOBs and email communications.
Email
Custom Logo
To display well on letters, your logo should be a .png on a transparent background, and be no larger than 400px x 80px.
Branding
Primary Color
What is currently Yuzu red in the portal becomes the plan designer’s chosen color.
Favicon Image
In the tab, the image that appears to the left of the tab description.

OG:Image
Image used in portal branding and image meta tag for link sharing. We recommend using a .svg file of your logo.
EOB Insert
The EOB insert is sent as an attached page in every EOB. Please upload a PDF.
There are no design restrictions on this EOB insert, but all copies will be printed in black and white, just like EOBs.
Step 2: Update Domain records to enable a working, white-labeled URL
Once you have completed the ‘Designer’ tab. Notify partners@yuzu.health or your account management contact immediately to kick off the technical process. This will set up your URL to be: portal.”partneraddress”.com
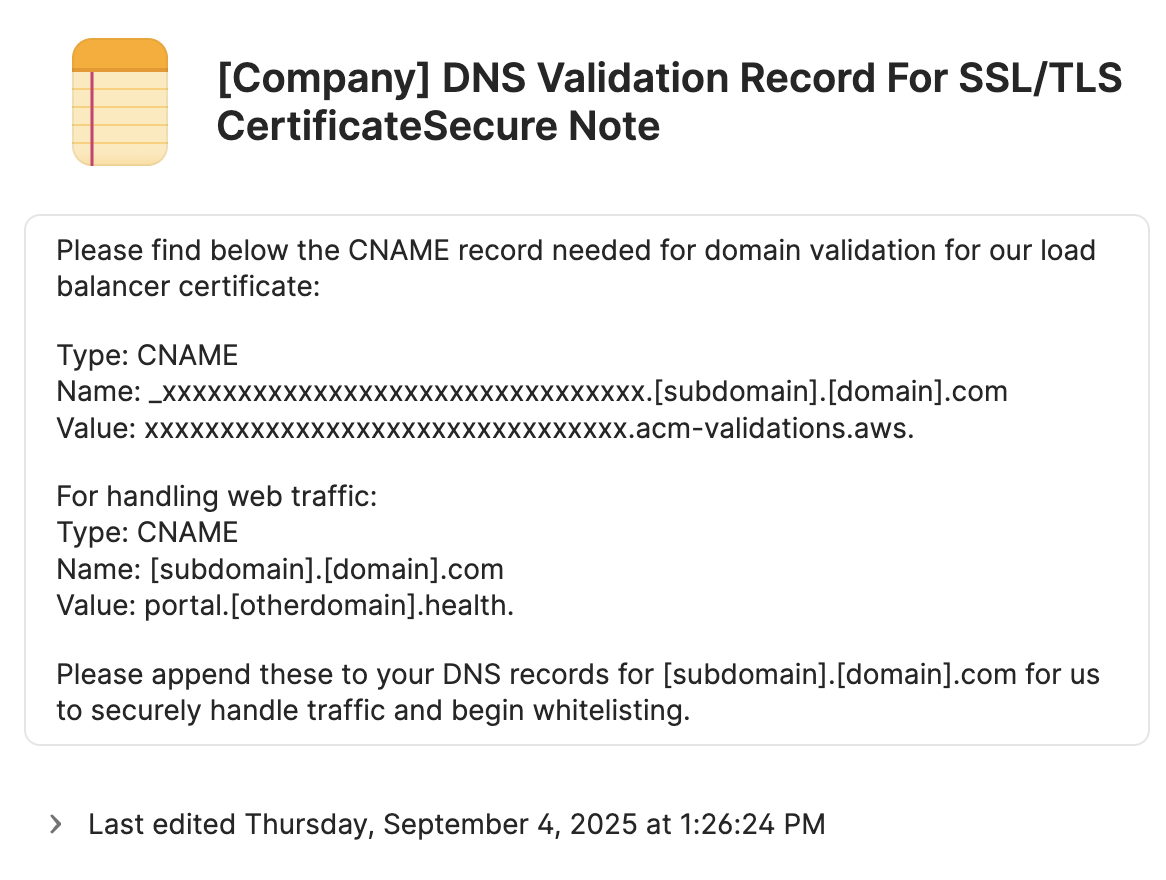
1. Yuzu sends a 1Password note
You’ll receive a secure 1Password note from Yuzu that contains the DNS records you need to add. These records look like short blocks of text with a Type, Name, and Value.
This begins a 24-hour clock where these records are active. Please take immediate action to avoid restarting the process.
2. Log in to your DNS provider
Go to the website or console where your domain is managed (e.g., GoDaddy, Cloudflare, Route 53, Google Sites, SquareSpace) and sign in.
3. Find your DNS settings
Each of these providers should have instructions on how to complete this task. It should be titled something similar to “Add a CNAME record” or “Add a CNAME record to your domain's DNS records”
Navigate to the section usually called “DNS Records,” “Manage DNS,” “Zone File,” or “Custom Records”
Some domain registrars (ex: GoDaddy will automatically append the domain and tld. For example, portal.domain.tld when entered becomes portal.domain.tld.domain.tld. Please keep this in mind as you’re setting up records.
4. Add the records provided by Yuzu
For each record in the 1Password note:
Select Type: CNAME
Enter the Name exactly as shown (also know as the Host)
Enter the Value exactly as shown (also known as the Alias data)
Save the record
Note: TTL does not need to be updated
Troubleshooting: Some DNS providers require you to cut off the main domain to be updated in their system. Example, portal.plumlockhealth.com. would need to become just portal. for it to work
5. Notify Yuzu immediately
To enable the site, notify Yuzu immediately. If the process was completed in less than 24 hours after the One Password was created and the proper branding information has been uploaded, the site should be good for launch.
6. Confirmation
Once the records are in place:
The SSL/TLS certificate will validate automatically.
Traffic to
portal."partneraddress".comwill securely route through Yuzu.
Step 3: Verify permissions for the noreply email
As the domain process kicks off, we also launch the process to send mail on behalf of the Sender / Noreply email added in the “Designer” tab field. This is different from the “Support Email” which was added above. A Sender / Noreply email is only used for automated outbound messages from the portal (e.g., welcome emails, portal log-in codes).
This URL for this email will follow the same pattern as the white-labeled portal. noreply@portal."partneraddress".com. By default, this will be a mailbox that is unable to receive replies. (This is possible to be set up by your staff since you are the owner of the domain).
To set this up, we’ll securely send over three CNAME records and instructions in a separate 1Password. These will allow us to sign emails on behalf of your subdomain.
Your DNS contact will need to publish those three records (similar to your previous white-label setup). Once completed, Yuzu will be able to send emails on your behalf from your white-labeled domain.
Step 4: Set up the branded demo environment
As part of white-labeling we also offer a fully branded demo environment to use to test processes, demo to users and potential customers.
This requires a separate, demo-specific URL to launch. Our preferred format for the URL is portal.”partnername”+”demo”.com
e.g.,
portal.plumlockhealthdemo.com
Once you have your preferred URL, reach out to partners@yuzu.health or your account management contact to kick off updating domain records (details on this process above in Step 2).