

While the plan design is imported from your templated plan designs, it is often necessary to adjust vendors and fees per group while the group is onboarding.
Updating Vendors
Ensure that each of these vendors on the group’s Vendors Tab is correct.
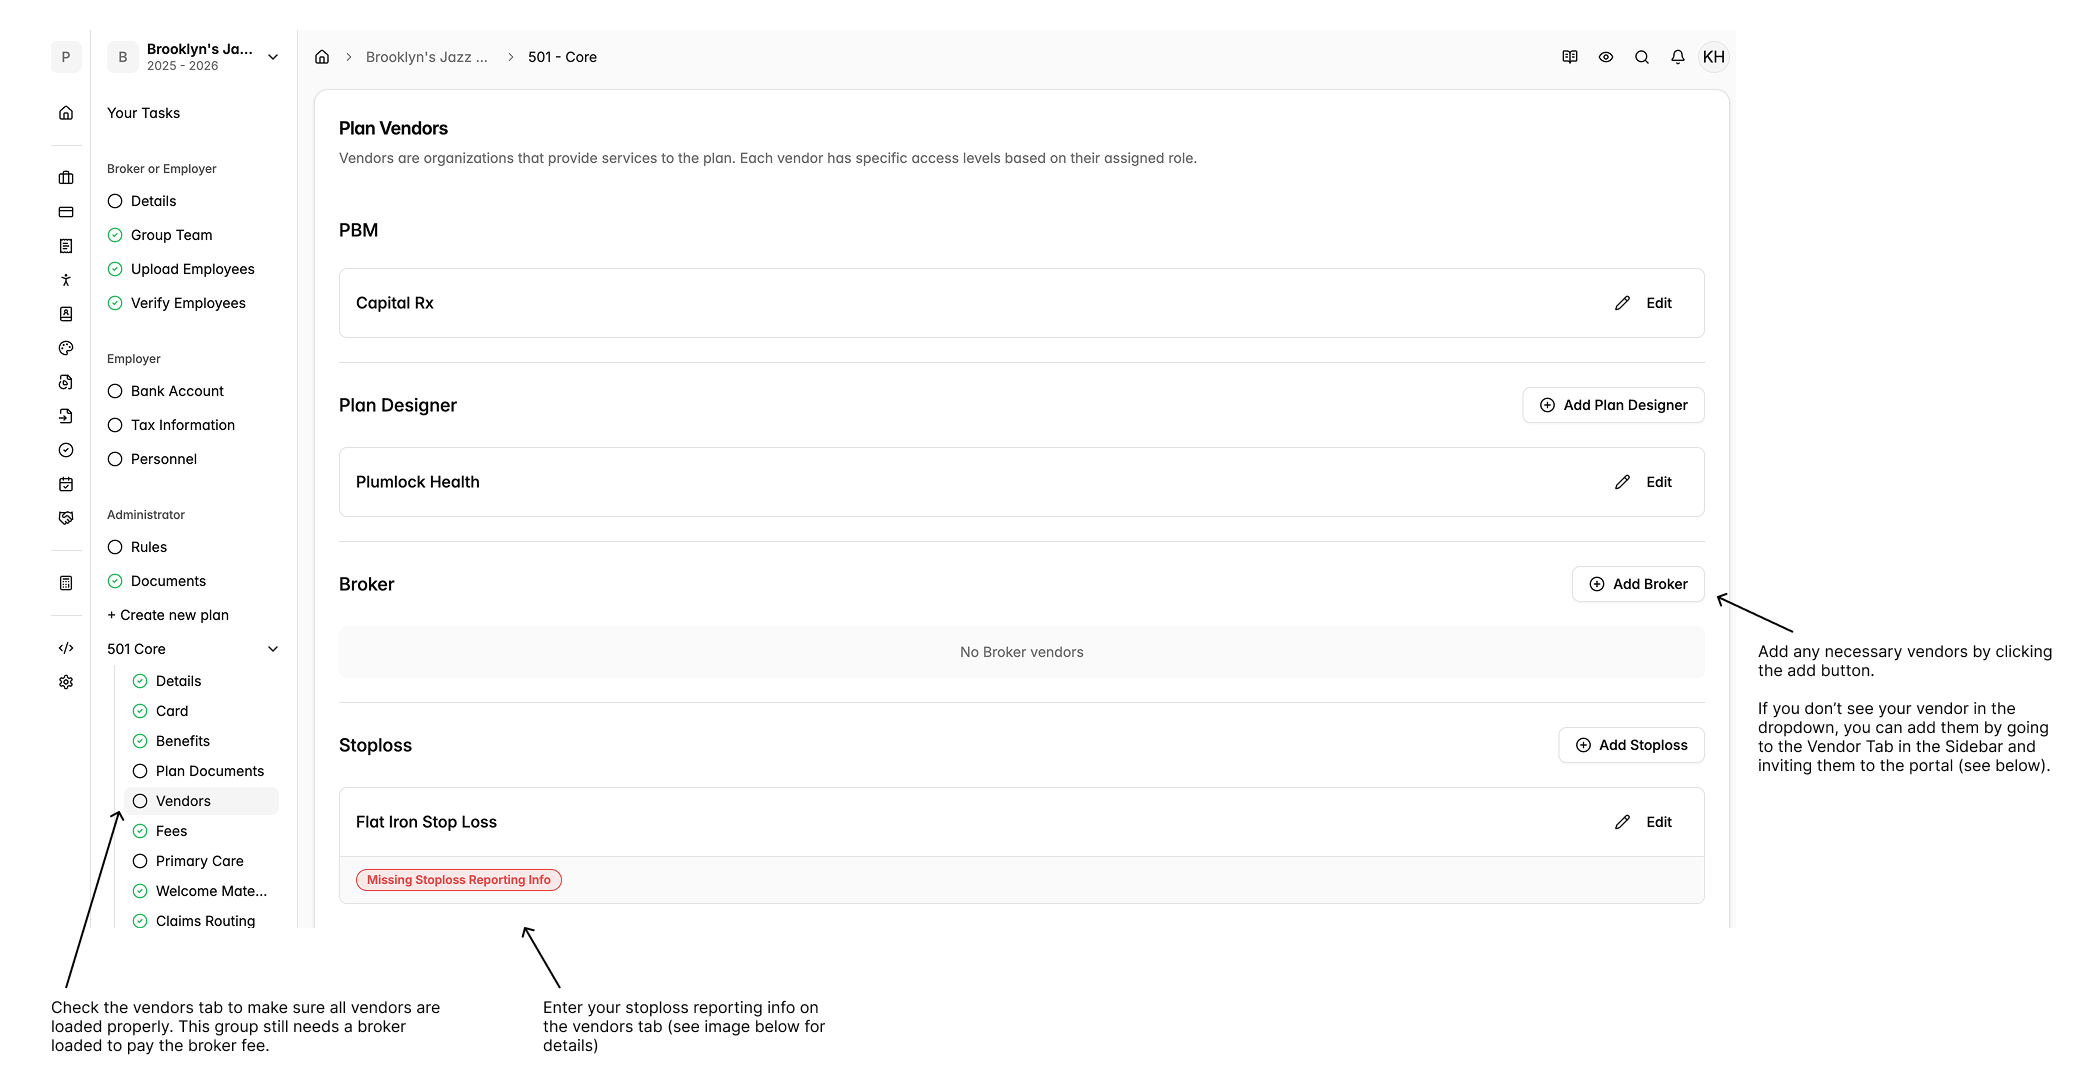
Most vendors should be pre-loaded, but some (like Brokers and COBRA), will need to be added to each group individually.
If the vendor you want to add is not visible, you can add them by going to the Vendors Tab on the sidebar.
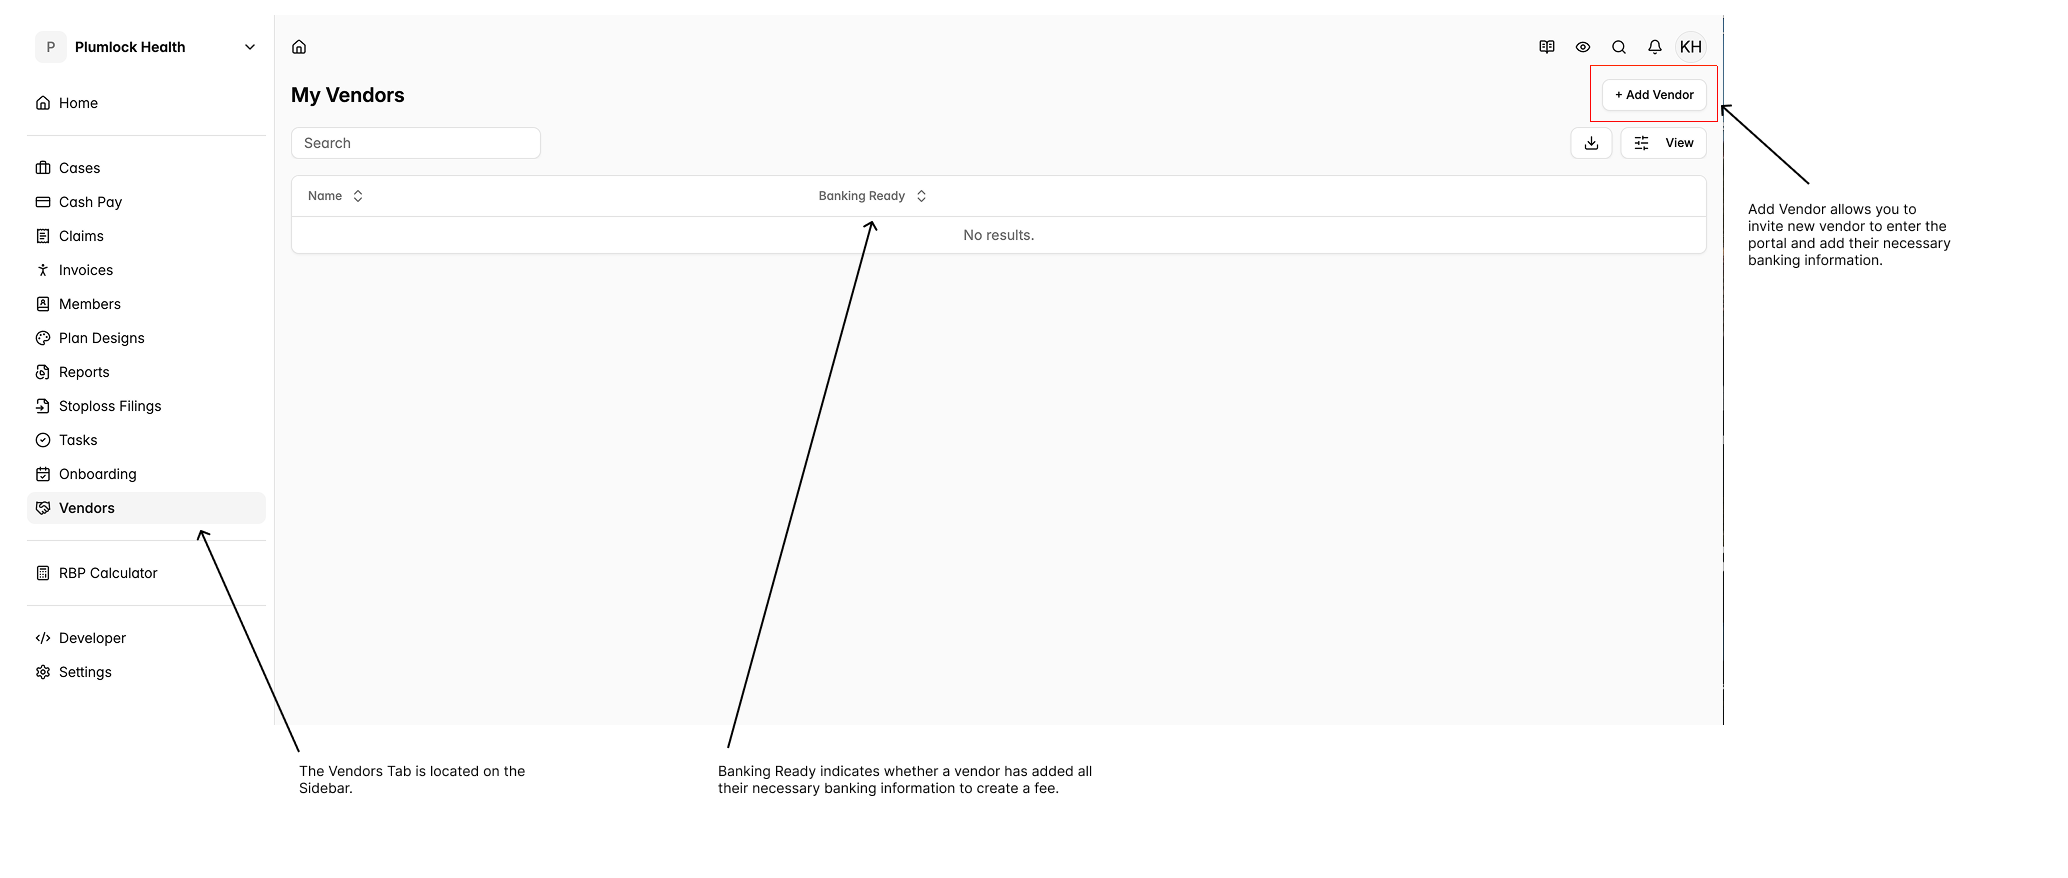
Add new vendors by going to the Vendors Tab on the sidebar and clicking Add Vendor. Then monitor your vendor’s progress using the Banking Ready column.
Sometimes a vendor exists in the system under a different name, be sure to check for these when going to add your vendors!
Updating Fees
To add a fee, press “+ Add Fee” in the top right corner. You are only able to add fees from Vendors that have been included in the Vendors tab on the group.
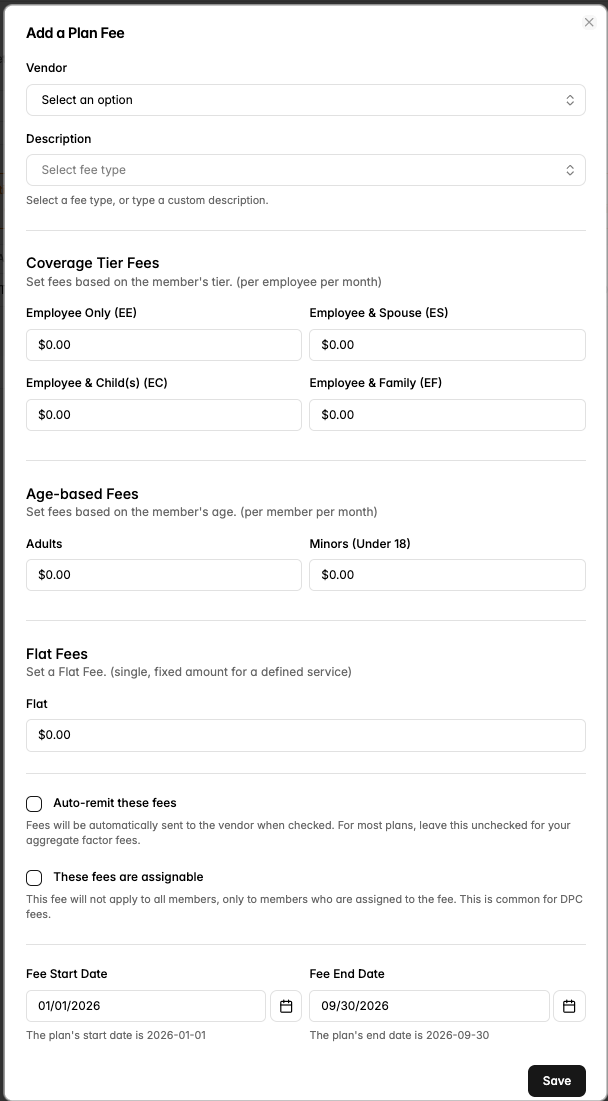
Vendors — Your full list of vendors as set up in the ‘Vendors’ tab. These might be greyed out if your vendor has not yet added their banking info in.
Description — This will be what the fee is named on the invoice to the employer.
Coverage Tier Fees — Where to input your PEPM fees.
Age-based Fees — Leave ‘Coverage Tier Fees’ empty and fill out this section for PMPM fees.
Flat Fees — This is how to input things like one-time fees or flat monthly fees.
Fee Start/End Date — This is automatically mapped to the plan start and end date. Typically we’d only change this in instances like 1 time fees where we’ll map a fee to start and end in the same month.
Auto-remitting fees to vendors
The majority of these fees will be automatically sent to the vendor when checked. For most plans, leave this checked for all fees but your aggregate factor fees. These checked fees will automatically be sent out the day after the pulled funds settle.
In order to save auto-remitted fee you’ll need to also assign an expense account. While our tool will typically recommend an accurate expense account, click in and type to search for your desired option.
Another way to find your desired expense account is to check the “Vendors” section of the onboarding page. You will see for each vendor type an organization. Most plan fees will have an expense account related to the vendor’s plan vendor type
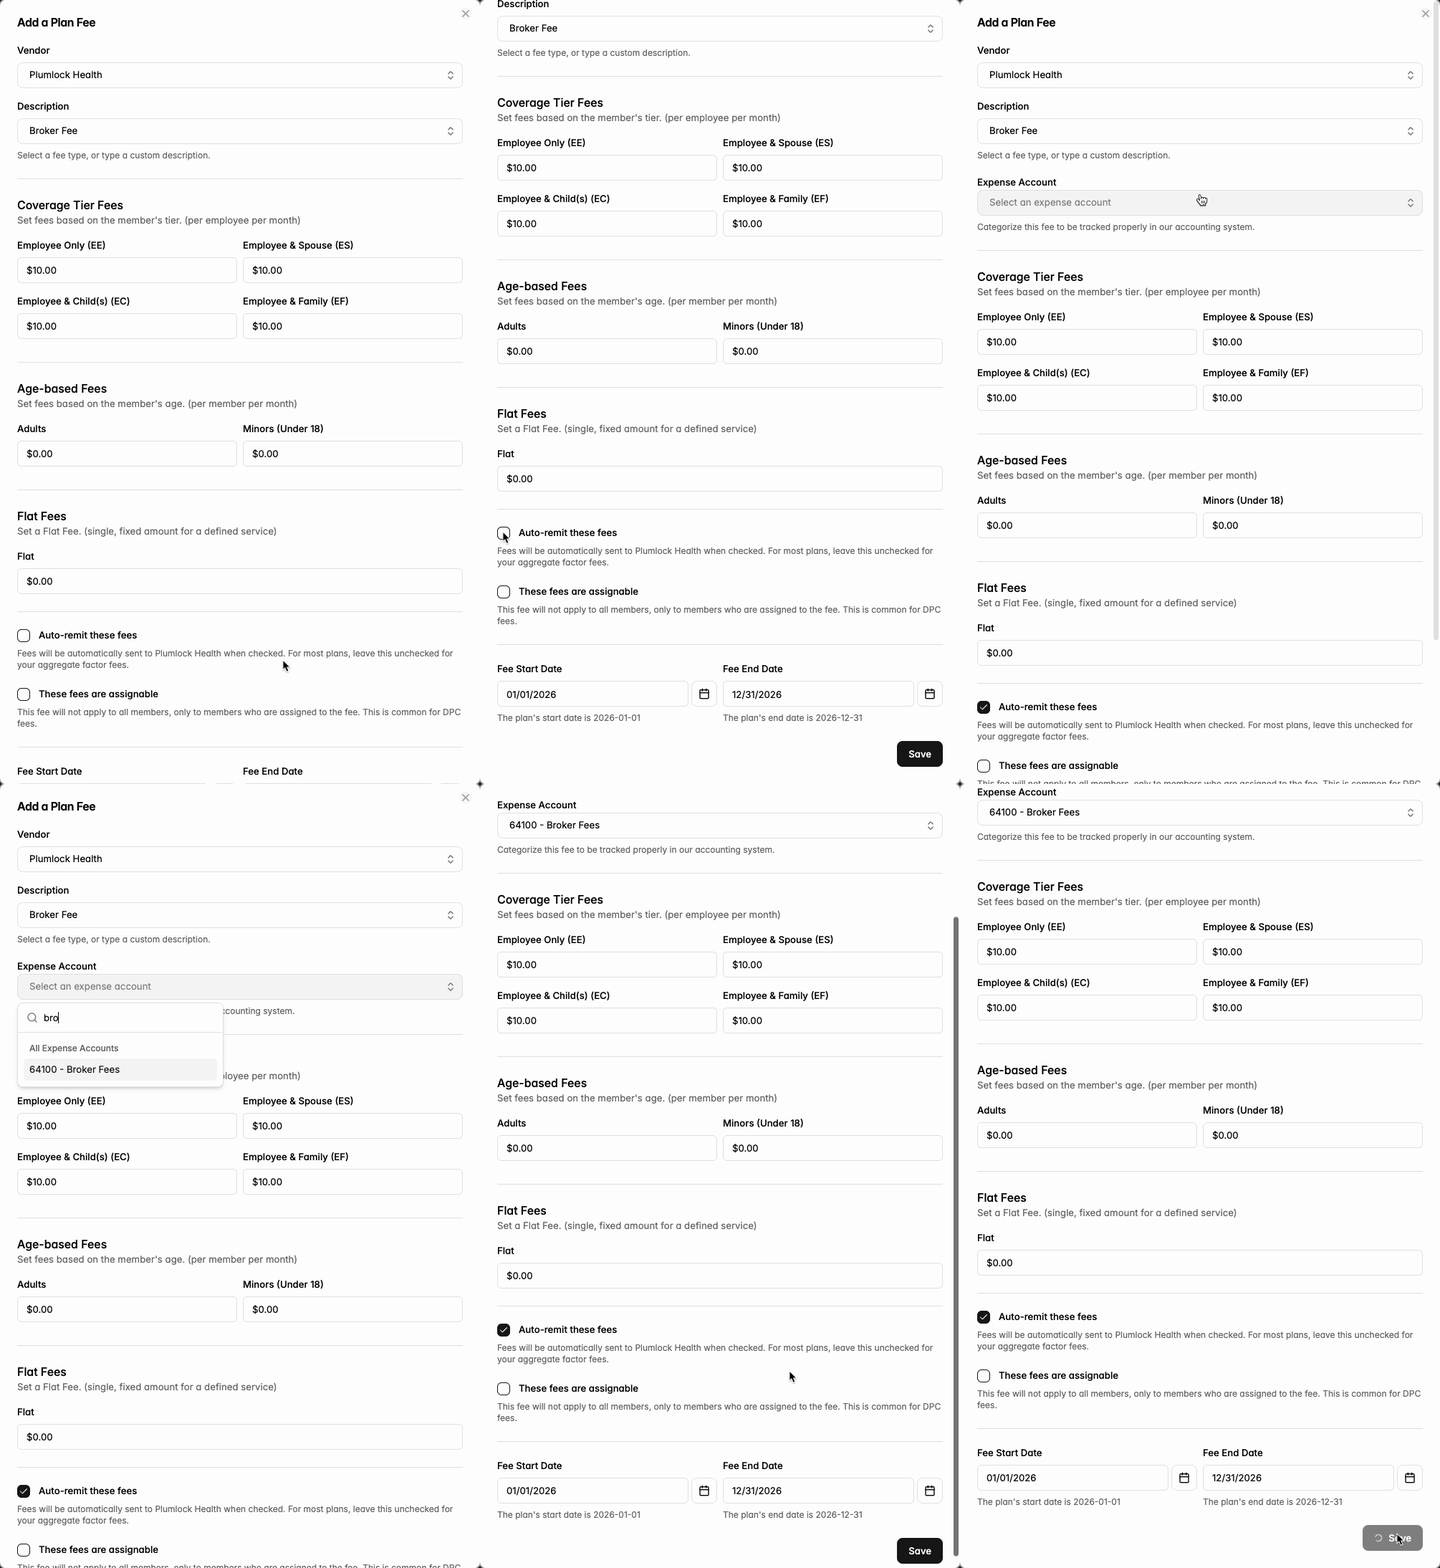
How to save your auto-remitted fees.
Checking if fees are assignable
Assignable fees mean that a particular fee will not apply to all members, only to members who are assigned to the fee. This is common for instances like DPC fees.
Changing fees in live plans
Once a plan and its fees are live you’ll see the below warning if you go to edit a fee
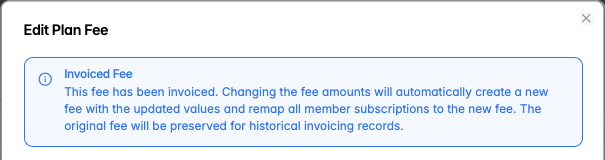
To change a fee for all prior months, change the fee directly in the ‘Edit Plan Fee’ pop up and hit save. This will create a historical record of a previous fee and will retroactively realign the fee.
For fees that were previously underpaid to vendors — The next invoice will reimburse for all months previously underpaid.
For fees that were previously overpaid to vendors — The next invoice will be credited and reflect a reduced dollar amount owed to that vendor.
To change a fee moving forward, change the fee directly in the ‘Edit Plan Fee’ pop up and edit the Fee Start Date to reflect when this new fee should take effect.
Verifying Fees
In order for a plan to go live the Plan Designer will need to click the ‘Verify Fees’ button at the top of the fees page. This will sign and date when fees were reviewed and allows us to feel confident that they look good before the plan goes live.
