

Intro
When you connect to HRIS with Yuzu, Employee Navigator becomes the source of truth for eligibility and core demographics (First and Last Name, Sex, DoB, and SSN). Meaning, all adjustments need to be made in EN and checked in the portal. For example, if a member is added in the portal but not added in the HRIS, then on the next file that member will term by omission because there will be no matching coverage.
Additionally, we require turning on notifications for a failed enrollment ingestion. Details on how to do that here: https://yuzu.health/docs/guides/enable-notifications-3.
If you get an enrollment error, we have a guide on how to fix the issue here: https://yuzu.health/docs/guides/hris-enrollment-troubleshooting.
All Employee Navigator/834 EDI File feed setup must be initiated by emailing HRIS@yuzu.health.
Create a new connection in Employee Navigator
On the main page, scroll to Admin Only section, and click on 834 EDI link. Yuzu only supports 834 file sends for inbound eligibility.
To create a new connection click “add a file, populate, and save”; click into this new file to begin configuration
Configure connection
1. Setup
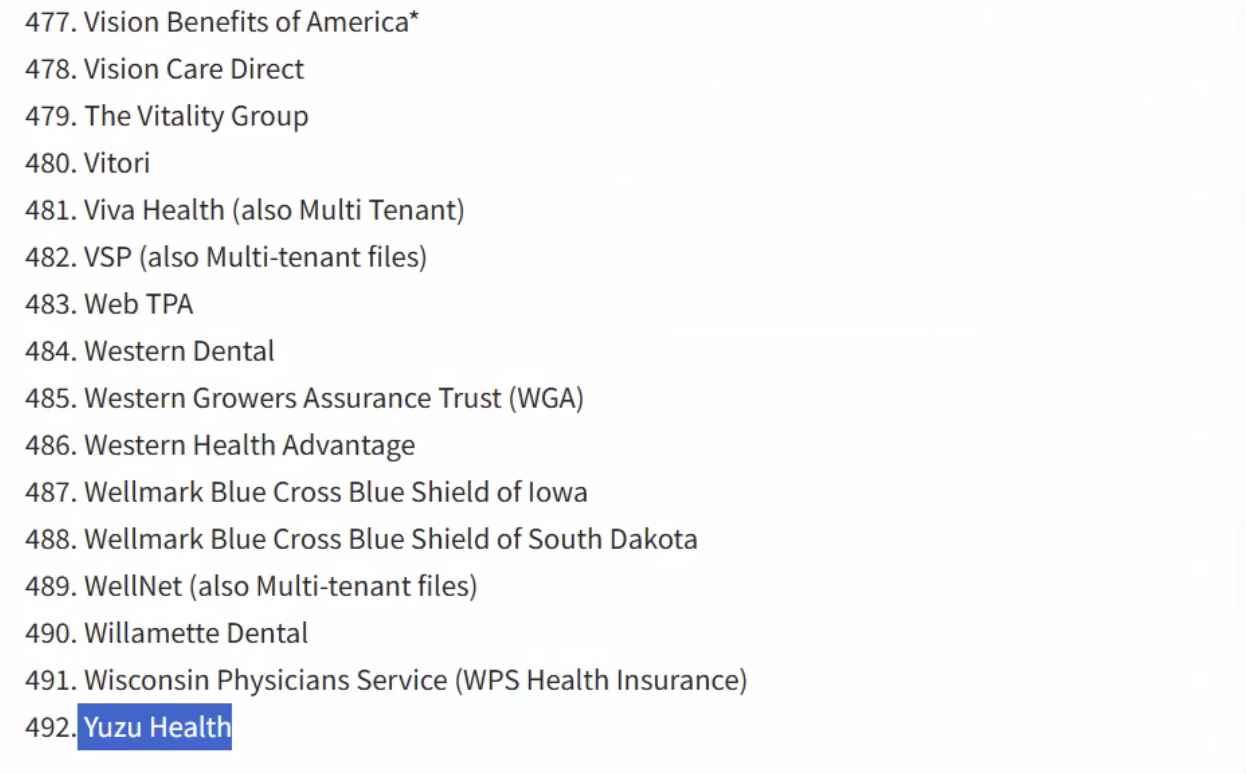
Add “Yuzu Health” as the carrier on the setup.
Full list of available carriers here: https://employeenavigator.com/marketplace/product/edi-834-
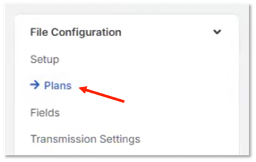
2. Plans
Select the fields appropriate for your plan
(e.g., include COBRA enrollments)
3. Fields
Fill out section with the details below:
Note: If the group has multiple plans, add a rule in the (4) 2300 HD_04 field. To check if there are multiple plans, click on the relevant Group > on the sidebar click “Plans” > check to see if there are multiple plans listed
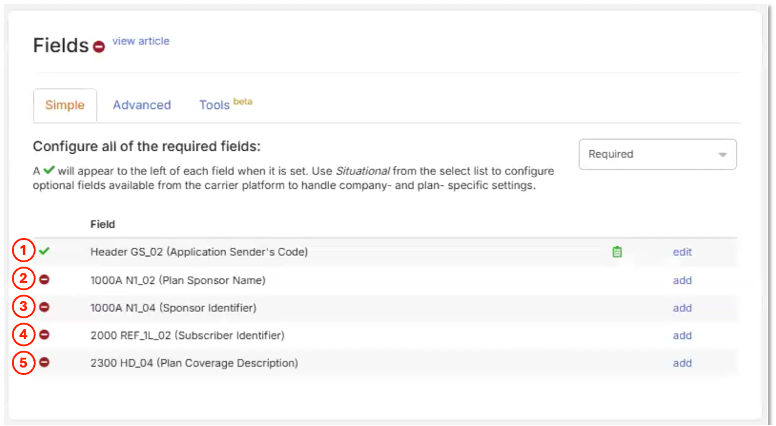
Fields that need to be completed. Details on where to find each one in the portal below.
A. Enter the group’s name under 02 Application Sender’s code
The group name matches the name in the portal. If the group name is over 15 characters only paste the first 15 letters.
If a group is onboarding: To copy and paste, click on the relevant group > on the sidebar click “Details” > copy the “Company Name”
If a group is live: To copy and paste, click on the relevant group > on the sidebar click “Settings” > copy the “Company Name”
Note: the check might appear green before this field has been updated
B. Enter the group’s name (Plan Sponsor Name)
Same as above
C. Enter the group’s Tax Identification (Sponsor Identifier)
If a group is onboarding: Go to the relevant group > on the sidebar click “Details” > copy the “EIN” towards the bottom of the page
If a group is live: Go to the relevant group > on the sidebar click “Settings” > copy the “EIN” towards the bottom of the page
D. Enter the group number (Subscriber Identifier)
If a group is onboarding: Go to the relevant group > on the sidebar click “Rules” > copy the “Group Number” below the Policy End Date Field
If a group is live: Go to the relevant group > on the sidebar click “Plans” > copy the “Group Number” which the second item in the table
Note: The group number is also visible from the main portal page with all of your relevant groups
E. Enter the plan ID (Plan Coverage Description)
To form the connection, the “Plan ID” for the selected plan needs to match what is in the portal. Assign the field using the mapped value flow (image below).
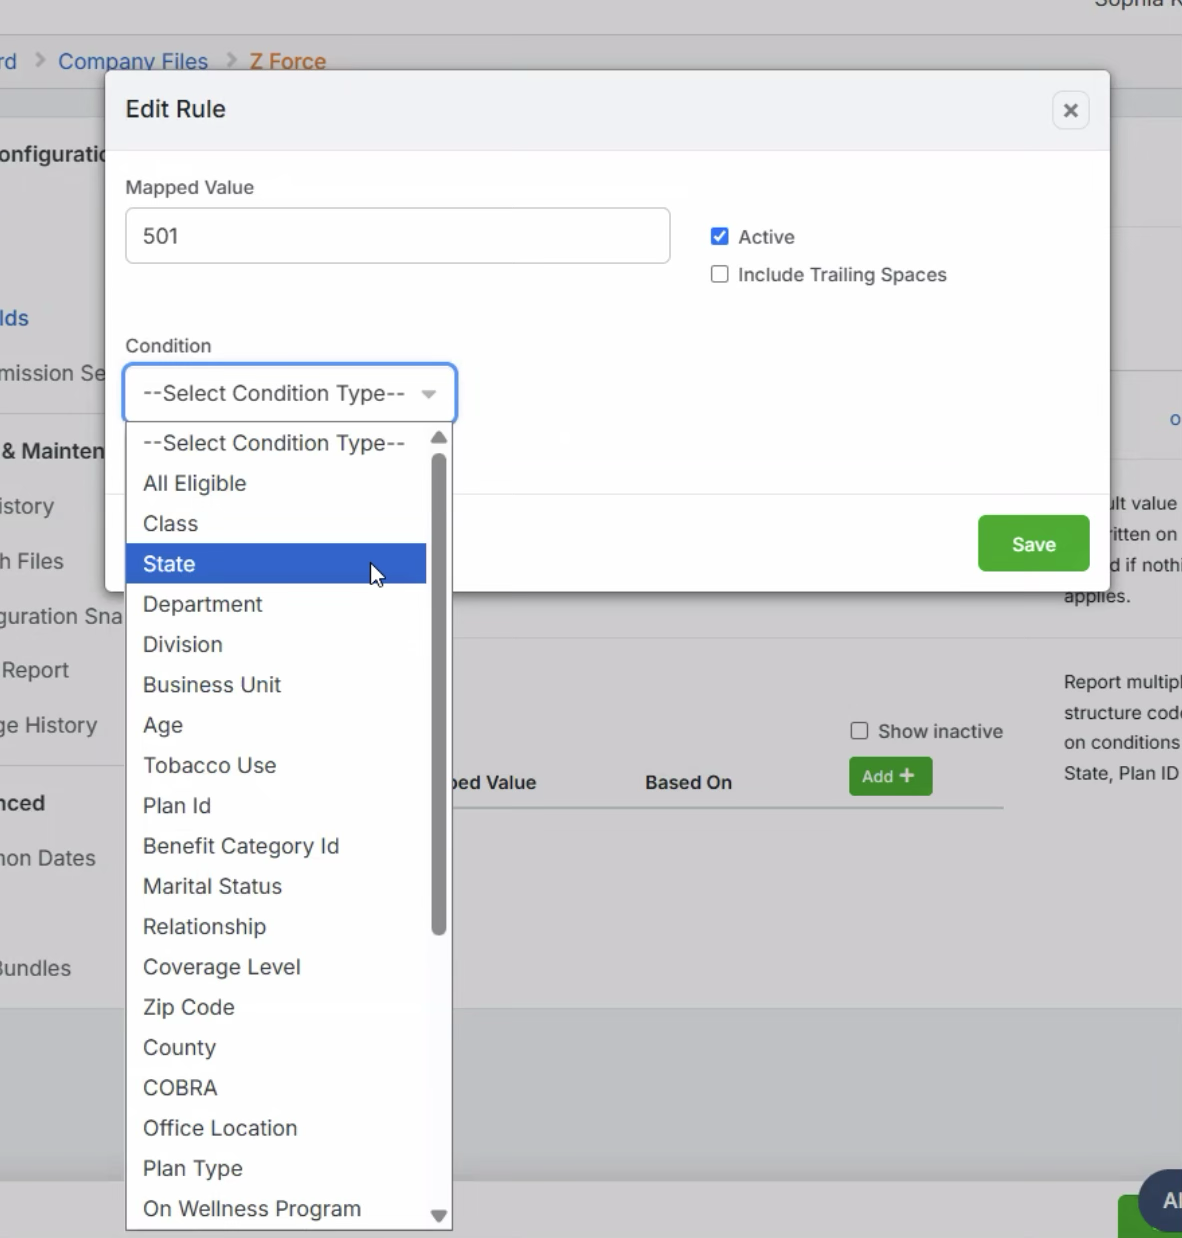
If a group is onboarding: Go to the relevant group > on the sidebar under the “Administrator” look for the plan numbers (typically 501 for the first plan, 502 for the second, etc.). This will always be a three-digit number.
If a group is live: Go to the relevant group > on the sidebar click “Plans” > copy the “Number” which is on the second table (typically 501 for the first plan, 502 for the second, etc.
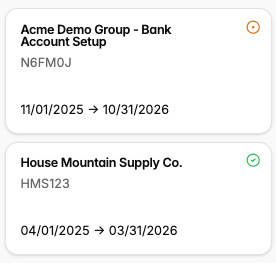
Onboarding groups have the yellow circle. Live groups have a green circle.
To correct the data mapping you will go to Home > Admin Only > 834 EDI > Click on the File Name > Fields > Click “edit” beside "2300 HD_04 (Plan Coverage Description)."
Here you will need to remove the "501" from the Default Value Field. The default value field is what passes regardless of the mapped rules and can cause problems if it is not needed.
If the code "501" to send when an EE is enrolled in the plan “501” plan in the Yuzu portal, then you do not need to make any changes to the rule that is in place. However, if the code In the Yuzu portal is different code you will need to click "Edit" beside the rule and update the mapped value to match what is in the portal.
4. Transmission Settings
When have gotten to this step reach out to Yuzu (HRIS@yuzu.health or your integrations contact, subject line: Employee Navigator SFTP) and we will generate SFTP credentials and share them with you via 1Password. Fill out section with below with this information.
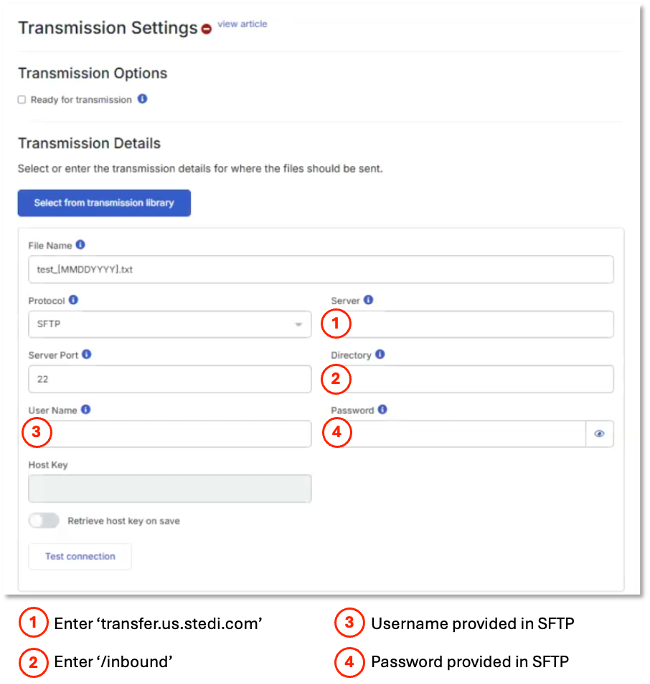
- Once completed, test the connection and save
5. Setup
Set ‘File Status’ to Production.
Set ‘Schedule Frequency’ to weekly and set the day of week to Monday. This is our preferred date as we check ingestion errors on Tuesday of each week.
6. File History
Generate file.
Click the history icon next to the search icon to verify the file has been generated.
Turn on spouse and dependent contact information
Context: Yuzu requires all Spouse and Dependent contact information (phone/email) to be included in the HRIS file. If this information is only updated in the portal, then it will be replaced by the next file.
By default, Employee Navigator does not include dependent information in the HRIS file, this will need to be toggled on manually.
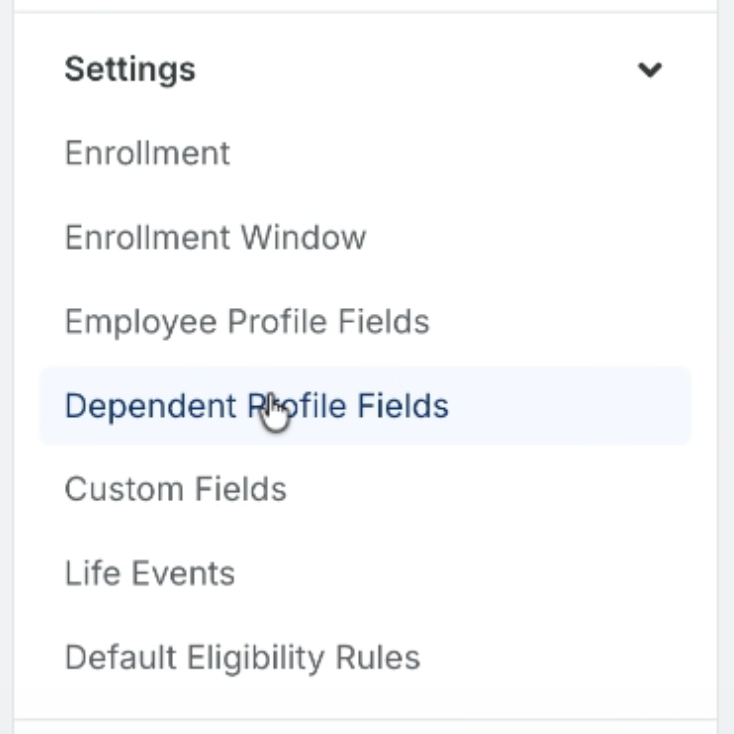
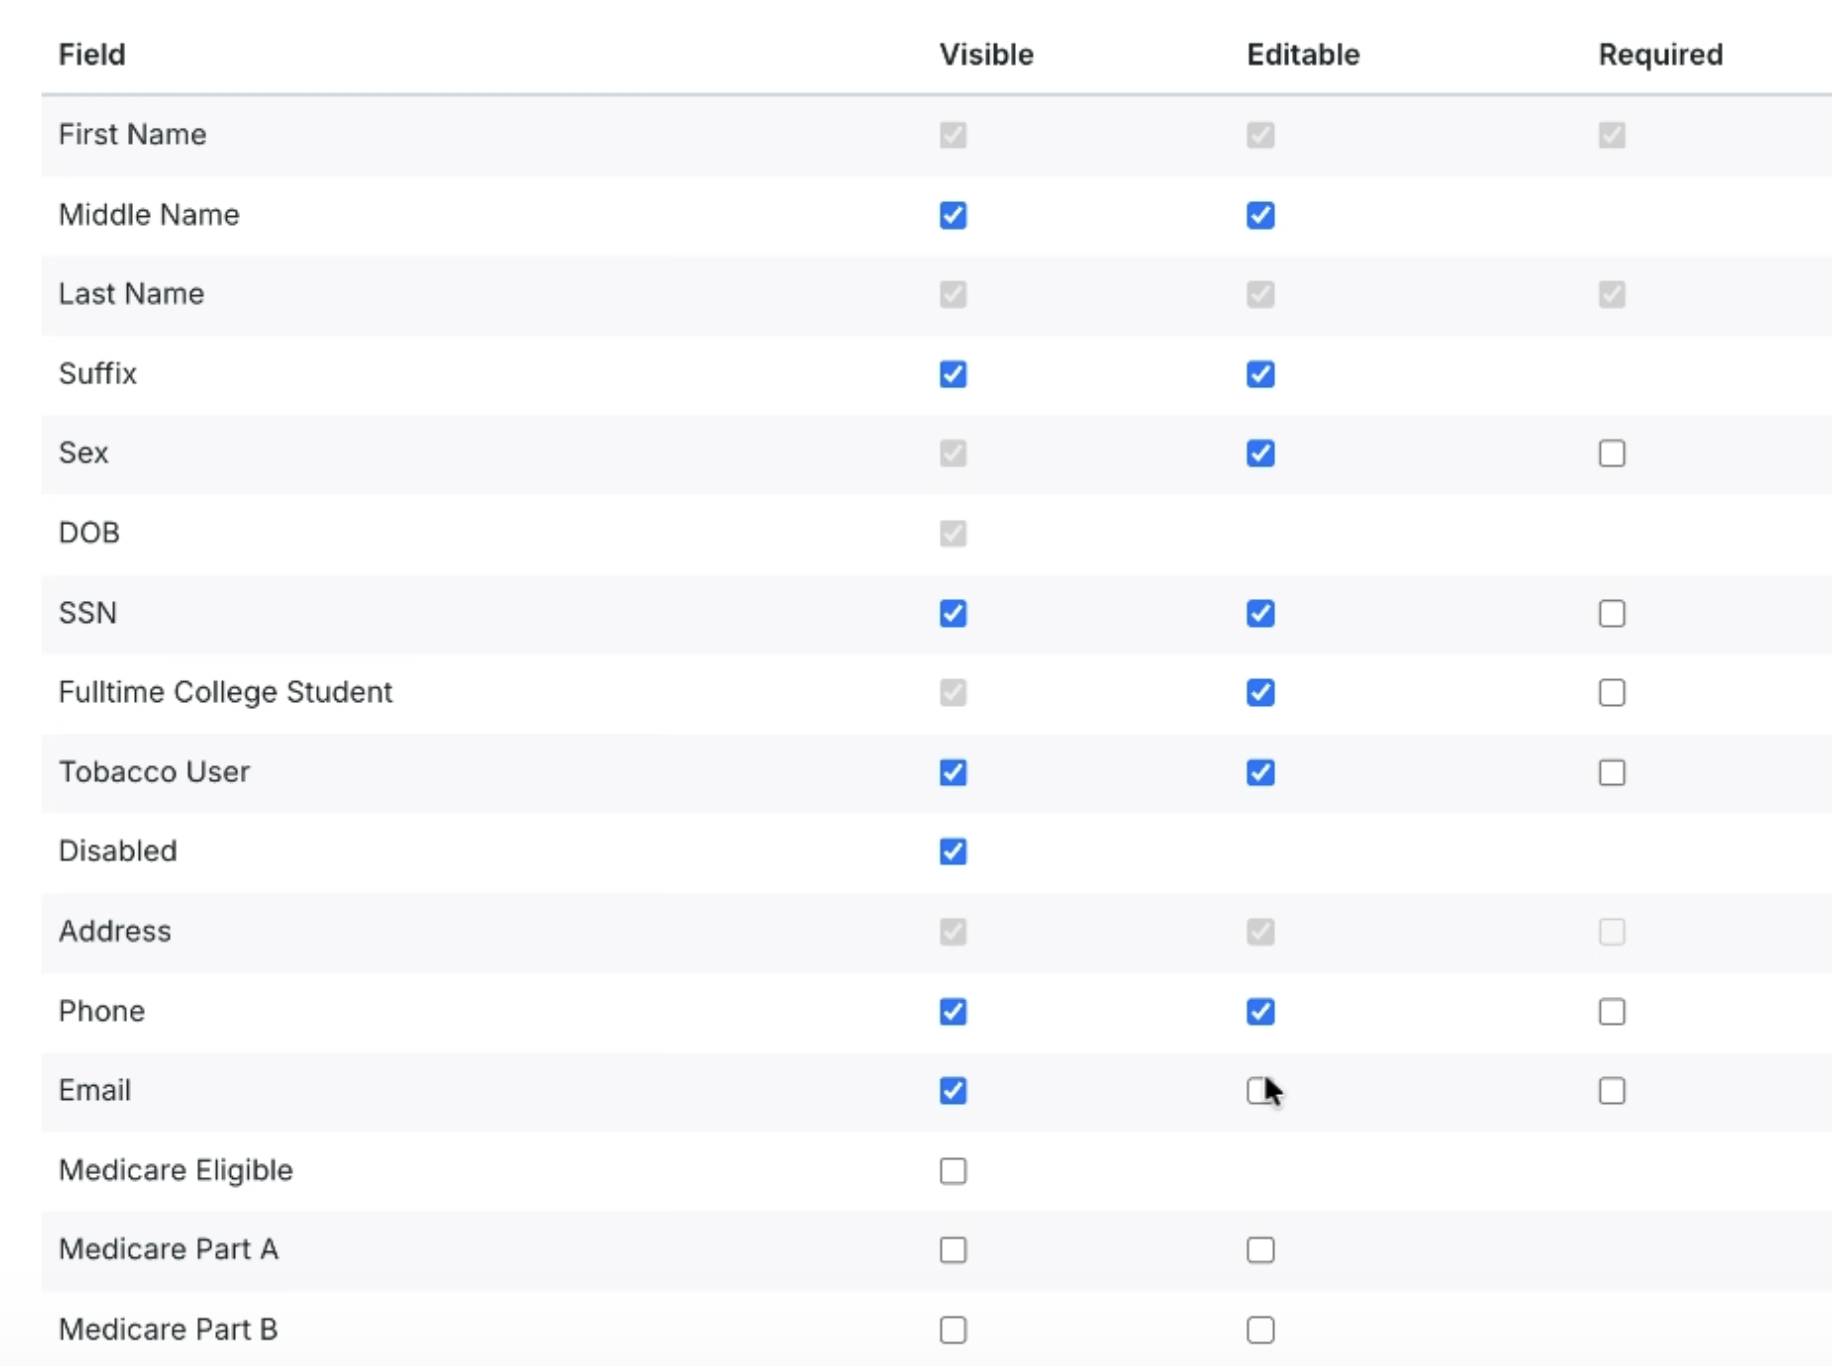
To do so, go to “Benefits” > “Settings” > “Dependent Profile Fields” > Toggle on Phone and Email to be visible and editable. We do not recommend to have it be “Required.”
Check completion and troubleshooting:
Make sure all checkmarks are green on the 834 File Configuration Checklist viewable on the Setup tab > Icon next to Setup header.
Notify Yuzu (hris@yuzu.health or your integrations contact) that the connection has been made.